


- 修复轮播图异常,优化网站性能,减少低网速卡顿异常
- 实现网页颜色自动变换,兼顾性能与美观
- 弹窗将只会在主页弹出,其他页面不显示,修复非主页页面刷新网站卡死的问题
- 日记照片由三列改为四列每行
- 右上角新增主题颜色选择器
首先需要一台vps;
命令行安装xui面板; apt update -y && apt install -y curl socat wget bash <(curl -Ls https://raw.githubusercontent.com/FranzKafkaYu/x-ui/master/install.sh)
此时后台会要求你设置相关信息,然而在通过端口进入xui,点击修改配置后,会跳出xui面板自动选择了新目录,此时再关闭的话就不能通过ip:端口来进入xui了,而是要记住xui新的目录地址;
 例如https://xui3.dreamlazy.site:4321/6biN/xui/setting这里我就需要加入相对应的域名来访问;
添加ssl证书增强安全性: curl https://get.acme.sh | sh ~/.acme.sh/acme.sh —register-account -m 你的邮箱 ~/.acme.sh/acme.sh —issue -d 你的域名 —standalone
这三步后会实现申请证书,注意域名要提前解析到对应的服务器ip地址; 如下; VJRchA/rgweZawZBh7wBK1d622n3x4Bz2YOgKw== -----END CERTIFICATE----- [Mon Dec 23 14:36:09 UTC 2024] Your cert is in: /root/.acme.sh/xui3.dreamlazy.site_ecc/xui3.dreamlazy.site.cer [Mon Dec 23 14:36:09 UTC 2024] Your cert key is in: /root/.acme.sh/xui3.dreamlazy.site_ecc/xui3.dreamlazy.site.key [Mon Dec 23 14:36:09 UTC 2024] The intermediate CA cert is in: /root/.acme.sh/xui3.dreamlazy.site_ecc/ca.cer [Mon Dec 23 14:36:09 UTC 2024] And the full-chain cert is in: /root/.acme.sh/xui3.dreamlazy.site_ecc/fullchain.cer
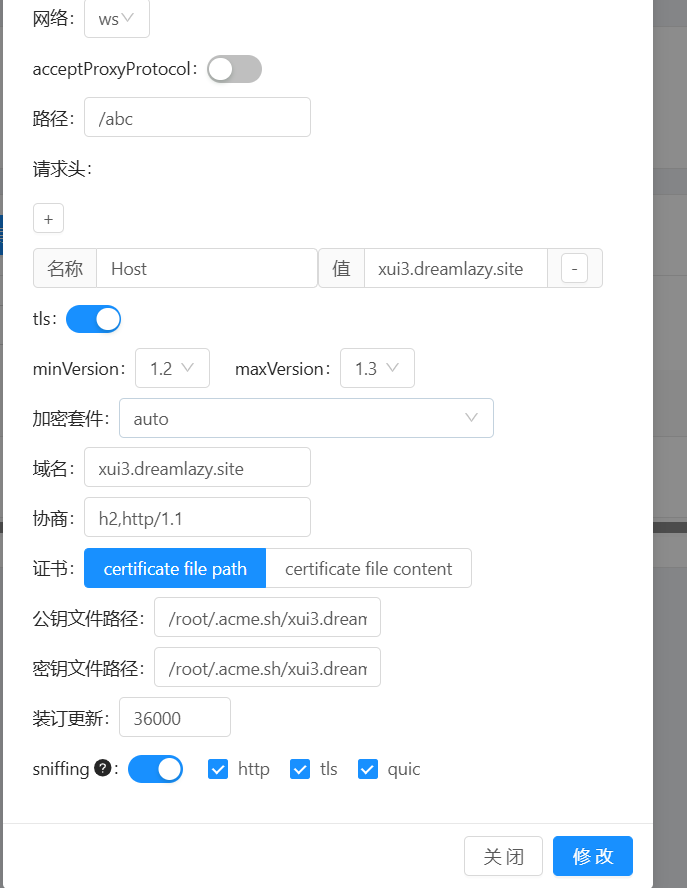
此时注意路径,要填入面板证书实现让面板https访问;

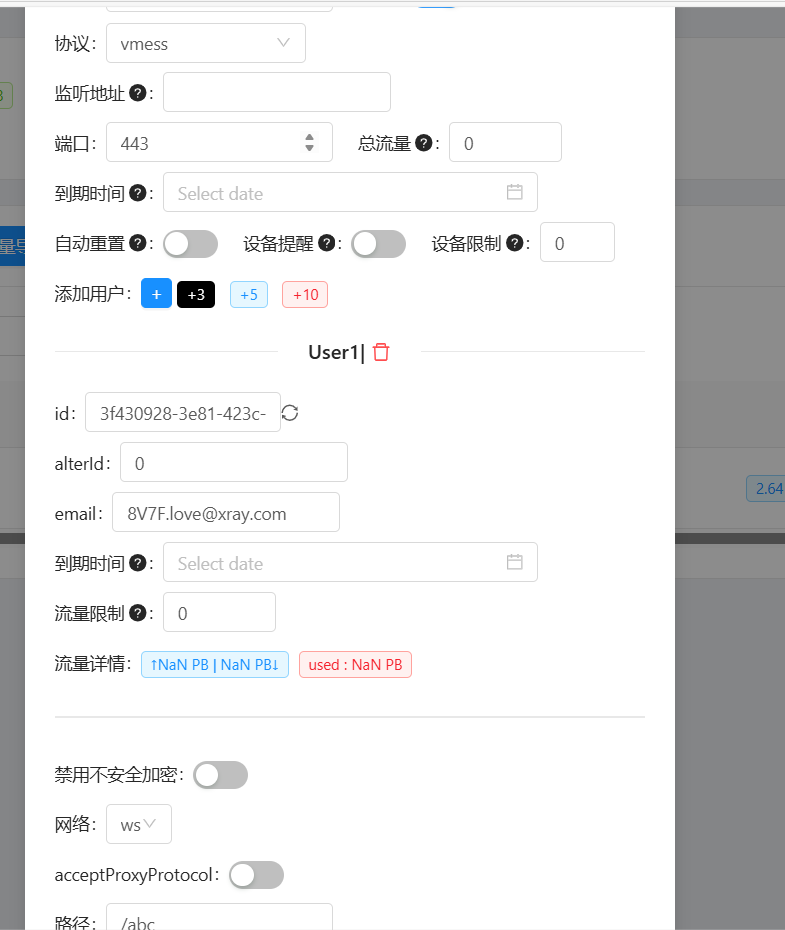
入站列表如下设置:
部分信息可能已经过时